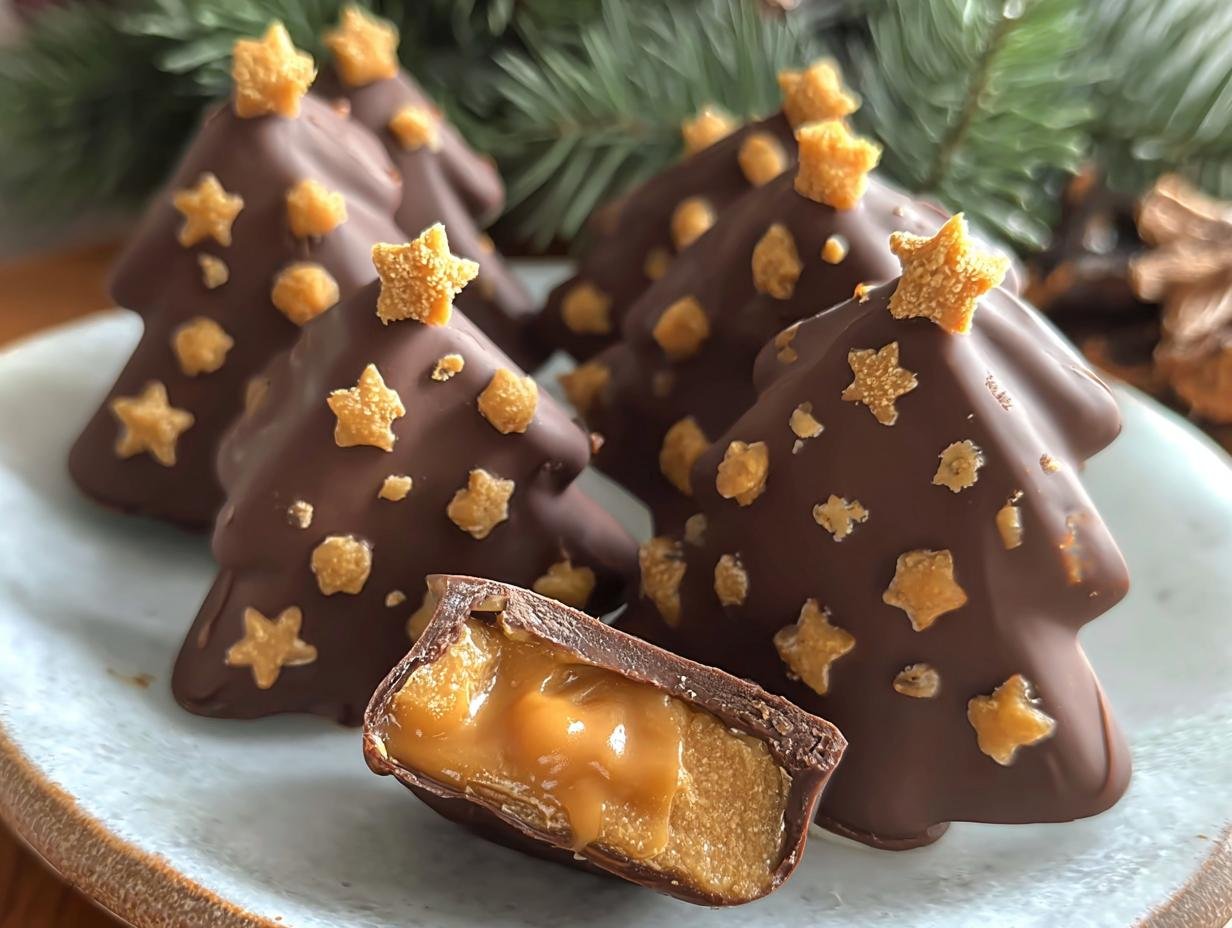
Chocolate Peanut Butter Christmas trees have become my absolute favorite holiday tradition! Every year, the moment December hits, I start dreaming of that perfect bite: the rich, smooth chocolate shell giving way to a soft, sweet peanut butter center. These festive little trees are so simple to whip up, making them my go-to for quick homemade gifts and holiday parties. I remember one year, my little cousins helped me make them, and the kitchen was dusted with powdered sugar and smelling heavenly – pure Christmas magic! They truly are some of the easiest chocolate peanut butter Christmas cookies you can make, and they disappear faster than Santa’s sleigh.
Why You’ll Love These Chocolate Peanut Butter Christmas Trees
Get ready to fall in love with these festive treats! They’re incredibly easy to make, perfect for busy holiday schedules.
- Unbeatable Taste: The classic pairing of rich chocolate and creamy peanut butter is always a winner.
- Quick Prep Time: With no baking involved, you can whip up a batch in under an hour.
- Budget-Friendly: Most ingredients are pantry staples, making these a cost-effective holiday indulgence.
- Family Fun: Kids adore helping to roll, cut, and dip these, making them a fantastic family activity.
- Make-Ahead Magic: These are perfect for prepping ahead, freeing up your time on Christmas Eve.
- Gifting Galore: Package them up for a thoughtful, homemade gift that anyone would appreciate.
- Versatile Delight: As far as Christmas chocolate peanut butter recipes go, these are wonderfully adaptable.
- Crowd-Pleasing Appeal: These Christmas chocolate peanut butter recipes are guaranteed to be a hit at any holiday gathering.
Ingredients for Homemade Chocolate Peanut Butter Christmas Trees
Gathering these simple ingredients is the first step to creating some truly special festive treats. The magic really happens with the combination of creamy peanut butter and rich chocolate, making these some of the best chocolate peanut butter Christmas cookies you’ll ever make.
- 1/2 cup unsalted butter, softened – this gives our peanut butter filling a wonderful richness
- 1/4 cup granulated sugar – just a touch of sweetness to balance the peanut butter
- 2 cups creamy peanut butter – make sure it’s smooth and creamy for the best texture
- 1/2 teaspoon salt – enhances all the flavors
- 1 tablespoon vanilla extract – for that classic sweet aroma and taste
- 4 cups powdered sugar – this is key to getting that dough-like consistency
- 6 cups Ghirardelli melting chocolate – a good quality melting chocolate ensures a smooth, shiny coating
How to Make Chocolate Peanut Butter Christmas Trees
Now for the fun part – bringing these festive treats to life! Follow these steps to create the most delightful peanut butter chocolate Christmas treats you’ve ever tasted. We’ll guide you through each stage, from creating that perfect peanut butter base to the final chocolatey coating. Learning how to make chocolate peanut butter Christmas treats is easier than you think!
Step 1: Preparing the Peanut Butter Filling
In your stand mixer, cream together the softened 1/2 cup unsalted butter and 1/4 cup granulated sugar until they’re light and fluffy. Next, add the 2 cups creamy peanut butter, 1/2 teaspoon salt, and 1 tablespoon vanilla extract. Gradually mix in the 4 cups powdered sugar on low speed until a thick dough forms. It should smell absolutely divine!
Step 2: Shaping and Freezing the Trees
Lay out two sheets of parchment paper. Roll the peanut butter dough between them to about 1/4 to 1/2 inch thick. Chill this sheet in the freezer for about 30 minutes until it’s firm enough to cut. Once chilled, remove the top layer of parchment and use your favorite Christmas tree cookie cutters to shape the dough. Place the cut trees onto a parchment-lined baking sheet and freeze again for another 30 minutes until they’re nearly frozen solid.
Step 3: Melting and Dipping in Chocolate
While your tree shapes are freezing, melt the 6 cups Ghirardelli melting chocolate. I usually do this in the microwave in 30-second intervals, stirring in between, until it’s smooth and glossy. Working quickly with your nearly frozen peanut butter trees, dip 2-3 at a time into the melted chocolate. Use a fork to lift them out, tapping gently on the side of the bowl to remove any excess chocolate. Place them back on the parchment paper to set.
Step 4: Decorating and Setting
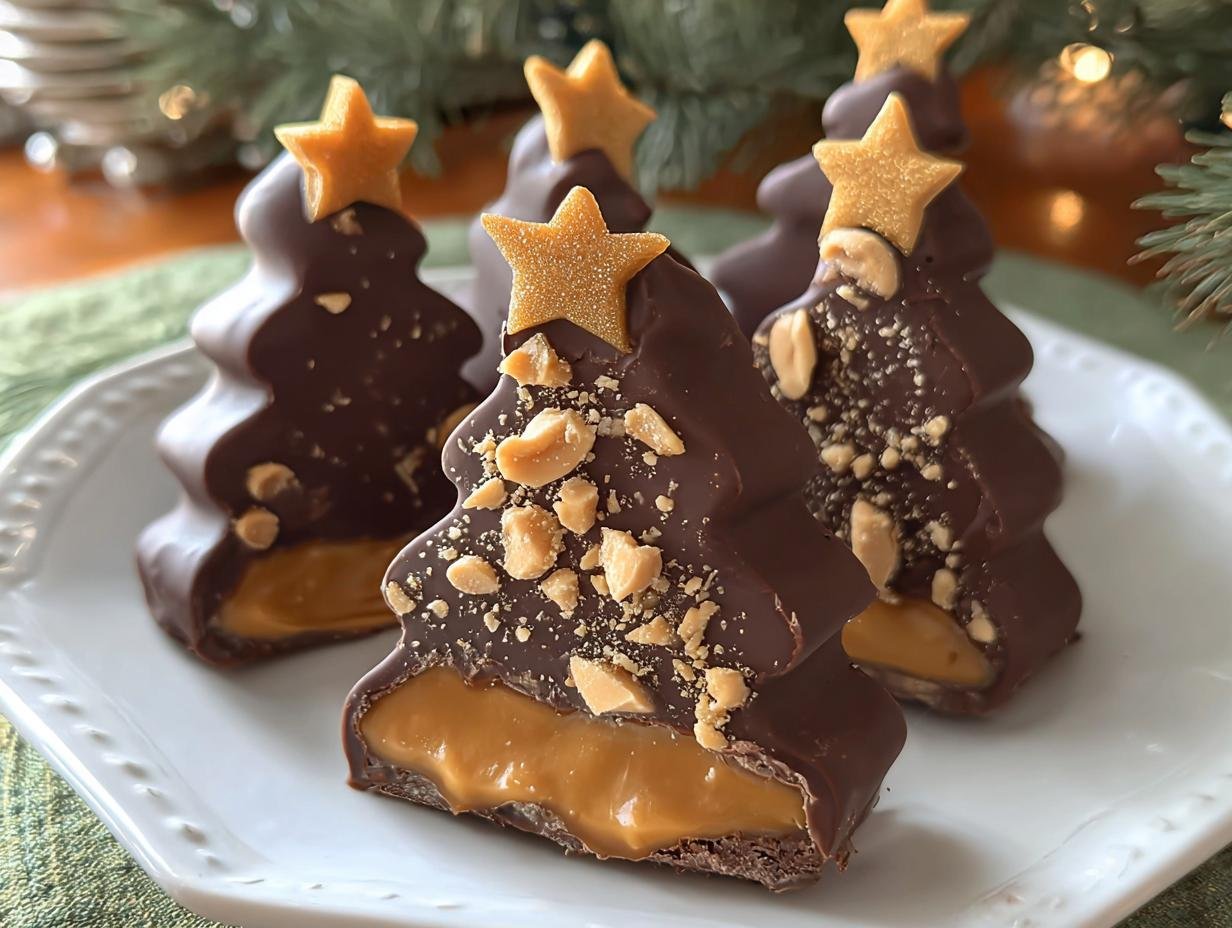
Once all your trees are dipped, you can add optional decorations while the chocolate is still wet. Think festive sprinkles, crushed candy canes, or even a sprinkle of sea salt for a sweet and salty kick. Let the chocolate harden completely before attempting to move the trees. This ensures a smooth, beautiful finish for your delicious chocolate peanut butter Christmas cookies.
Pro Tips for the Best Chocolate Peanut Butter Christmas Treats
Want to elevate your holiday baking game? I’ve picked up a few tricks over the years that make these chocolate peanut butter Christmas trees absolutely perfect every time. They’re simple enough for anyone to master!
- Use the right peanut butter: Stick to commercial creamy peanut butter, not natural varieties where the oil separates. It gives you the best texture for rolling and shaping.
- Keep it cold: Work in batches and freeze the peanut butter shapes between steps. This is crucial for clean dipping and preventing the trees from melting in your hands.
- Don’t overheat the chocolate: Melt the chocolate slowly and gently. Overheated chocolate can seize or become lumpy, making it harder to get a smooth coating.
- Add festive flair: Don’t be afraid to get creative with your decorations! Sprinkles, crushed candy canes, or a dusting of edible glitter can make these truly special.
What’s the secret to perfect Chocolate Peanut Butter Christmas Trees?
The secret is all about temperature control! Keeping the peanut butter centers frozen solid before dipping ensures they hold their shape and don’t melt into the chocolate. This makes them some of the most delightful festive chocolate peanut butter desserts. For more tips on creating perfect desserts, check out these dessert recipes.
Can I make Chocolate Peanut Butter Christmas Trees ahead of time?
Absolutely! These are fantastic make-ahead treats. Once they’re fully set, you can store them in an airtight container with parchment paper between layers. They’ll stay delicious for a couple of weeks.
How do I avoid common mistakes with Chocolate Peanut Butter Christmas Trees?
The biggest mistake is using natural peanut butter, which can make the dough too soft. Also, don’t rush the freezing steps; it’s vital for a clean dip. If your chocolate gets too thick, add a teaspoon of vegetable oil to smooth it out – this is key for perfect chocolate peanut butter Christmas candy.
Best Ways to Serve Chocolate Peanut Butter Christmas Trees
These delightful little trees are so versatile and just beg to be shared! They make a stunning centerpiece on any holiday dessert table, nestled amongst other festive treats. For a truly show-stopping display, I love arranging them on a platter with some fresh cranberries and rosemary sprigs to really bring out that festive, seasonal feel. They’re also fantastic as part of a cookie exchange or packaged beautifully as edible chocolate peanut butter Christmas gifts. Pair them with a warm mug of spiced cider or hot cocoa for the ultimate cozy Christmas experience, making them some of the most beloved holiday chocolate peanut butter desserts. For other festive drinks, consider a Blood Orange Mimosa.
Nutrition Facts for Chocolate Peanut Butter Christmas Trees
These delightful chocolate peanut butter Christmas treats are a festive indulgence! Here’s a general idea of what you can expect per tree, though exact amounts can vary based on size and specific ingredients used.
- Serving Size: 1 tree
- Calories: Approximately 200-250
- Fat: Approximately 12-15g
- Saturated Fat: Approximately 5-7g
- Protein: Approximately 3-5g
- Carbohydrates: Approximately 25-30g
- Fiber: Approximately 1-2g
- Sugar: Approximately 20-25g
- Sodium: Approximately 50-75mg
Nutritional values are estimates and may vary based on specific ingredients used.
How to Store and Reheat Chocolate Peanut Butter Christmas Trees
Once your beautiful chocolate peanut butter Christmas trees are perfectly set, proper storage is key to keeping them fresh and delicious. I always let them cool completely on the parchment paper before attempting to move them, which usually takes about 20-30 minutes at room temperature. Then, I carefully place them in an airtight container, using parchment paper or wax paper between layers to prevent sticking. This way, they’re perfect for enjoying later or even for giving as chocolate peanut butter Christmas gifts.
You can store these delightful treats in the refrigerator for up to two weeks, which is fantastic for making ahead of your holiday festivities. For longer storage, they freeze beautifully for up to one month! When you’re ready to enjoy them from the freezer, just transfer them to the refrigerator overnight to thaw slowly. If they seem a bit soft after thawing, a quick 10-15 second blast in the microwave on a paper towel can help firm up the chocolate coating again. For more make-ahead ideas, consider these easy cinnamon rolls.
Frequently Asked Questions About Chocolate Peanut Butter Christmas Trees
What are chocolate peanut butter Christmas trees?
These are delightful no-bake treats featuring a creamy, sweet peanut butter center shaped like Christmas trees and coated in a rich chocolate shell. They’re a festive twist on classic candy recipes, perfect for the holidays and a wonderful addition to any Christmas chocolate peanut butter recipes collection. For more holiday baking inspiration, see our Cinnamon Orange Jam Linzer Cookies.
Can I use different types of peanut butter?
For the best results with these chocolate peanut butter Christmas cookies, I highly recommend using commercial creamy peanut butter, like Jif or Skippy. Natural peanut butter, where the oil separates, can make the dough too soft and difficult to work with, potentially leading to a less successful outcome for your homemade chocolate peanut butter Christmas creations. If you’re interested in other peanut-based recipes, you might like our Mediterranean Chickpea Salad.
How do I get a smooth chocolate coating?
Melting chocolate properly is key for that smooth, glossy finish. I find microwaving in short intervals (30 seconds, stir, then 15-second intervals) works best. Be careful not to overheat it, as this can cause it to seize. If it seems a bit thick, adding a tiny bit of vegetable shortening or coconut oil can help thin it out for easier dipping, ensuring your chocolate peanut butter Christmas candy looks professional. You can learn more about proper cooking techniques at The Beauty of Food.
Can these be made vegan?
You can adapt these festive chocolate peanut butter desserts for a vegan diet! Use vegan butter, ensure your peanut butter is dairy-free, and opt for vegan powdered sugar and vegan chocolate chips or melting wafers. It’s a simple switch that keeps all the delicious holiday flavor intact.
Variations of Chocolate Peanut Butter Christmas Treats You Can Try
While these classic chocolate peanut butter Christmas trees are amazing, don’t be afraid to get creative! Exploring different variations can add even more fun to your holiday baking. These ideas are perfect for switching things up or catering to different tastes and dietary needs, making your chocolate peanut butter holiday baking even more special.
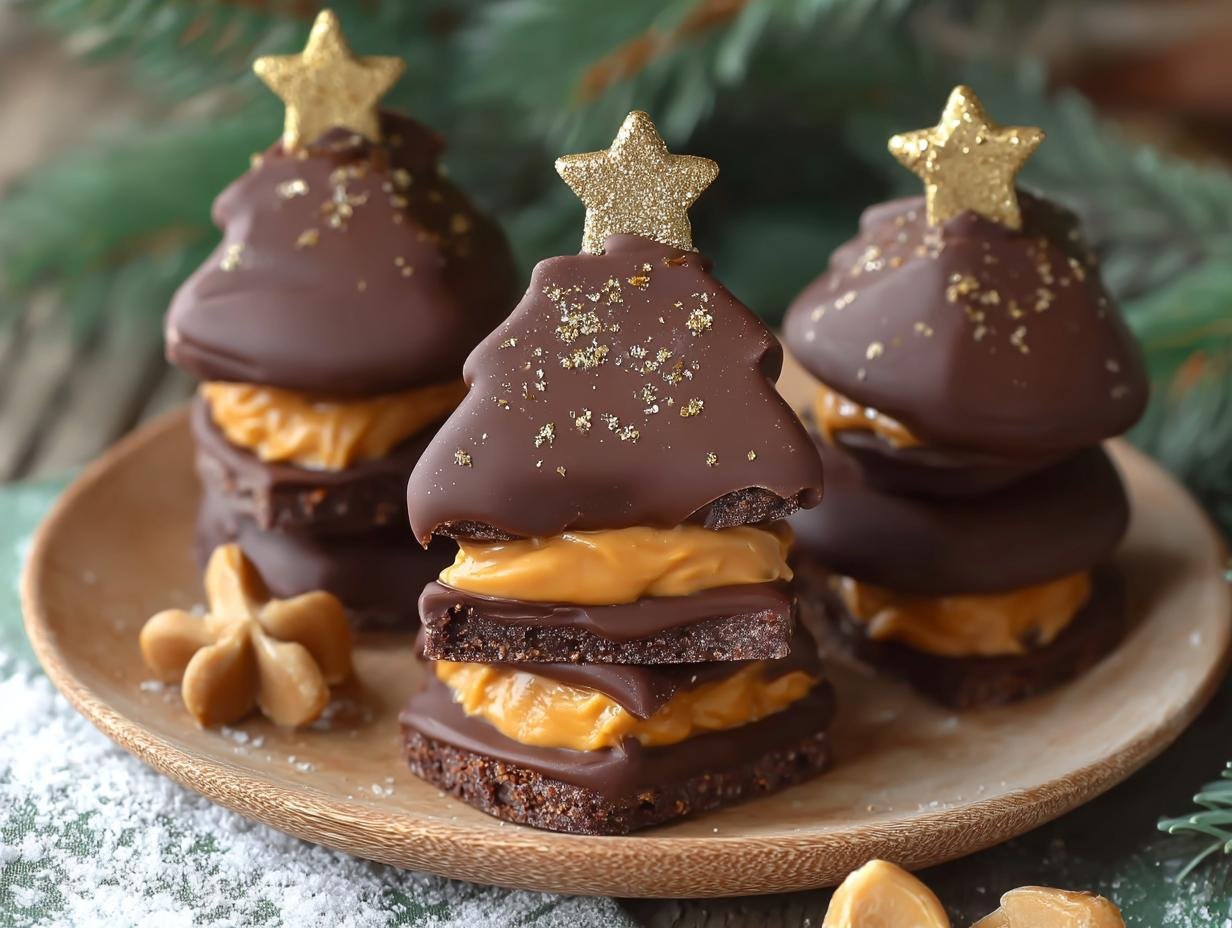
- Cookie Cutter Fun: Instead of trees, use star, snowflake, or bell cookie cutters for a different festive look. You can even make simple balls and flatten them slightly before dipping for a different shape of peanut butter chocolate Christmas treats.
- Dietary Swaps: For a dairy-free or vegan version, use vegan butter, a dairy-free peanut butter, and vegan chocolate chips. Ensure your powdered sugar is also free from animal products. This makes them accessible for everyone to enjoy these festive chocolate peanut butter desserts.
- Flavor Boosts: Add a pinch of cinnamon or a dash of peppermint extract to the peanut butter filling for a twist. You can also experiment with different types of chocolate for coating, like dark chocolate or white chocolate, for varied flavor profiles.
- Topping Adventures: Once dipped, try rolling the still-wet chocolate in chopped nuts, crushed candy canes, or festive sprinkles for added texture and visual appeal. A drizzle of contrasting chocolate color also looks beautiful.
Choc Peanut Butter Christmas: Easy 1-Hour Recipe

These no-bake Chocolate Peanut Butter Christmas Trees combine a soft, sweet peanut butter filling with a rich chocolate shell. Inspired by Reese’s holiday treats, they’re festive, freezer-friendly, and perfect for gifting or sharing at holiday gatherings.
- Prep Time: 45 minutes
- Cook Time: 0 minutes
- Total Time: 1 hour 30 minutes
- Yield: 18–24 trees 1x
- Category: Dessert
- Method: No-Bake
- Cuisine: American
- Diet: Vegetarian
Ingredients
- 1/2 cup unsalted butter, softened
- 1/4 cup granulated sugar
- 2 cups creamy peanut butter
- 1/2 teaspoon salt
- 1 tablespoon vanilla extract
- 4 cups powdered sugar
- 6 cups Ghirardelli melting chocolate
Instructions
- In a stand mixer, blend softened butter, granulated sugar, and peanut butter until light and fluffy.
- Add salt, vanilla extract, and powdered sugar gradually on low speed. Mix on high for 30 seconds until a dough forms.
- Roll dough between two parchment sheets to 1/4–1/2 inch thick. Freeze for 30 minutes.
- Remove the top parchment and cut tree shapes using a cookie cutter. Place trees on parchment-lined sheet.
- Repeat the process with leftover dough, then freeze the shaped trees for another 30 minutes until nearly frozen.
- Melt chocolate in the microwave (1 minute, stir, then 30 seconds, stir again until smooth).
- Dip 2–3 trees at a time into melted chocolate. Use a fork to lift and tap off excess chocolate. Place on parchment to set.
- Optional: Drizzle extra melted chocolate over trees for decoration. Let the chocolate harden fully.
- Store in an airtight container with parchment layers.
Notes
- Use commercial creamy peanut butter for best consistency.
- Work in batches during dipping to prevent trees from softening.
- Freeze between steps to keep tree shapes firm.
- Decorate with sprinkles, crushed candy canes, or sea salt for a festive touch.
- Store in fridge for 2 weeks or freezer for up to 1 month.
Nutrition
- Serving Size: 1 tree
- Calories: Approximately 200-250 (estimate)
- Sugar: Approximately 20-25g (estimate)
- Sodium: Approximately 50-75mg (estimate)
- Fat: Approximately 12-15g (estimate)
- Saturated Fat: Approximately 5-7g (estimate)
- Unsaturated Fat: Approximately 7-8g (estimate)
- Trans Fat: 0g
- Carbohydrates: Approximately 25-30g (estimate)
- Fiber: Approximately 1-2g (estimate)
- Protein: Approximately 3-5g (estimate)
- Cholesterol: Approximately 15-20mg (estimate)


Leave a Reply