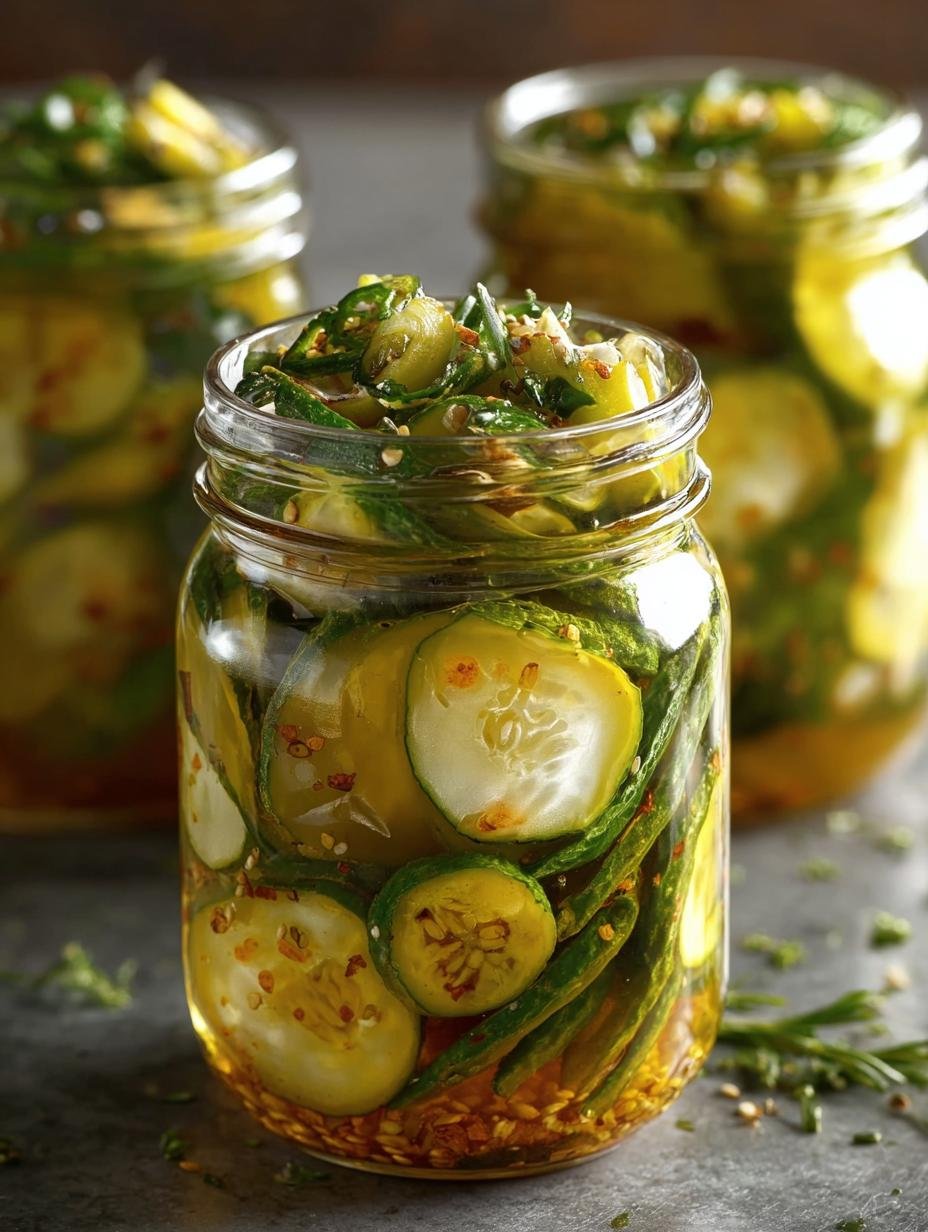
Canning Pickles has become a cherished tradition in my kitchen, allowing me to enjoy the crisp tang of homemade pickles year-round. This method not only preserves the vibrant crunch of pickling cucumbers but also brings a delightful burst of flavor to any meal. With simple ingredients and steps, you can create delicious, shelf-stable dill pickles that add zest to sandwiches, salads, and more. Let’s dive into this rewarding process!
Why You’ll Love This Canning Pickles
There are countless reasons to embrace the art of canning pickles. First, you can control the ingredients, ensuring they are fresh and free from preservatives. Second, canning allows you to customize flavors to suit your taste with spices and herbs. Third, it’s an economical way to use seasonal pickling cucumbers and reduce food waste. Additionally, home-canned pickles make fantastic gifts for friends and family. Learning how to can pickles also gives you a sense of accomplishment. This easy process allows even beginners to create something truly special. Lastly, homemade pickles have a unique taste that far surpasses store-bought varieties.
Ingredients for Canning Pickles
Gather these items:
- 3–4 pounds pickling cucumbers (Kirby cucumbers)
- 2 1/2 cups white vinegar (5% acidity)
- 2 1/2 cups water
- 1/4 cup pickling salt
- 4 heads fresh dill or 4 teaspoons dill seeds
- 4 garlic cloves, peeled
- Optional: 1 teaspoon mustard seeds per jar
- Optional: 1/2 teaspoon whole black peppercorns per jar
- Optional: 1/4 teaspoon red pepper flakes per jar
- Optional: 1 bay leaf per jar
How to Make Canning Pickles Step-by-Step
- Step 1: Wash cucumbers thoroughly and trim 1/16 inch from the blossom end to help maintain crispness.
- Step 2: Sterilize 4 pint mason jars in boiling water for 10 minutes and keep them hot.
- Step 3: In a large pot, combine vinegar, water, and pickling salt. Bring to a gentle boil, stirring until salt dissolves.
- Step 4: Place dill and garlic at the bottom of each hot jar. Add optional spices if desired.
- Step 5: Pack cucumbers tightly into jars, leaving 1/2 inch headspace.
- Step 6: Pour hot brine over cucumbers, maintaining 1/2 inch headspace.
- Step 7: Remove air bubbles, wipe rims clean, and apply lids and bands fingertip tight.
- Step 8: Process jars in a boiling water bath for 10 minutes (adjust time for altitude if necessary).
- Step 9: Remove jars and allow to cool undisturbed for 12–24 hours. Check seals before storing.

Pro Tips for the Best Canning Pickles
Keep these in mind:
- Use fresh, firm pickling cucumbers for the best texture.
- Ensure your jars and lids are completely sterilized to prevent spoilage.
- Experiment with spices to find your favorite flavor combination.
- Follow the vinegar pickling process closely for safety.
- Consider using a water bath canning method for better preservation.
- Let the pickles sit for at least a week before consuming to develop flavors.
Best Ways to Serve Canning Pickles
There are many ways to enjoy your homemade pickles. Serve them as a crunchy side dish to grilled meats or sandwiches. They also make a fantastic addition to salads, providing a tangy contrast to fresh greens. For a fun twist, chop them up and mix them into potato salads or deviled eggs. You could even serve them alongside charcuterie boards for a delightful snack option.
How to Store and Reheat Canning Pickles
Store your canned pickles in a cool, dark place for optimal shelf life. After the jars have cooled completely, check the seals and store any unsealed jars in the refrigerator. Properly canned pickles can last for up to a year when stored correctly. If you plan to eat them within a few weeks, refrigerator pickles are also an option. They don’t require processing and can be enjoyed right away!
Frequently Asked Questions About Canning Pickles
What’s the secret to perfect Canning Pickles?
The secret to perfect canning pickles lies in selecting fresh, high-quality pickling cucumbers and maintaining a proper brine ratio. The vinegar pickling process is crucial for flavor and preservation.
Can I make Canning Pickles ahead of time?
Absolutely! Canning pickles can be made ahead of time and stored for several months. Just ensure they are properly sealed and stored in a cool place.
How do I avoid common mistakes with Canning Pickles?
Common mistakes in canning pickles include not sterilizing jars correctly, using the wrong type of cucumbers, and not following the recipe closely. Following the steps to can pickles carefully will ensure success.
Variations of Canning Pickles You Can Try
Feel free to get creative with your canning pickles! You can try adding different spices like coriander or dill seed for unique flavors. For a spicy kick, include jalapeños or red pepper flakes. You might also consider creating sweet pickles by adding sugar to your brine. Experiment with different types of vinegar, such as apple cider vinegar, to change the flavor profile. There’s no limit to the delicious variations you can create!

For more delicious recipes, check out homemade tomato sauce or spaghetti with garlic and oil. If you’re interested in healthy options, consider making Mediterranean chickpea salad as a refreshing side dish.
PrintCanning Pickles: 7 Steps to Perfect Homemade Delights

This canning pickles recipe shows you how to make crisp, tangy, shelf-stable dill pickles using a safe water bath method. Perfect for preserving fresh cucumbers and enjoying homemade pickles all year long.
- Prep Time: 20 minutes
- Cook Time: 20 minutes
- Total Time: 40 minutes
- Yield: 4 pint jars 1x
- Category: Preserving
- Method: Water Bath Canning
- Cuisine: American
- Diet: Vegetarian
Ingredients
- 3–4 pounds pickling cucumbers (Kirby cucumbers)
- 2 1/2 cups white vinegar (5% acidity)
- 2 1/2 cups water
- 1/4 cup pickling salt
- 4 heads fresh dill or 4 teaspoons dill seeds
- 4 garlic cloves, peeled
- Optional: 1 teaspoon mustard seeds per jar
- Optional: 1/2 teaspoon whole black peppercorns per jar
- Optional: 1/4 teaspoon red pepper flakes per jar
- Optional: 1 bay leaf per jar
Instructions
- Wash cucumbers thoroughly and trim 1/16 inch from the blossom end to help maintain crispness.
- Sterilize 4 pint mason jars in boiling water for 10 minutes and keep them hot.
- In a large pot, combine vinegar, water, and pickling salt. Bring to a gentle boil, stirring until salt dissolves.
- Place dill and garlic at the bottom of each hot jar. Add optional spices if desired.
- Pack cucumbers tightly into jars, leaving 1/2 inch headspace.
- Pour hot brine over cucumbers, maintaining 1/2 inch headspace.
- Remove air bubbles, wipe rims clean, and apply lids and bands fingertip tight.
- Process jars in a boiling water bath for 10 minutes (adjust time for altitude if necessary).
- Remove jars and allow to cool undisturbed for 12–24 hours. Check seals before storing.
Notes
Nutrition
- Serving Size: 1 pickle
- Calories: 8
- Sugar: 1g
- Sodium: 220mg
- Fat: 0g
- Saturated Fat: 0g
- Unsaturated Fat: 0g
- Trans Fat: 0g
- Carbohydrates: 2g
- Fiber: 0g
- Protein: 0g
- Cholesterol: 0mg


Leave a Reply