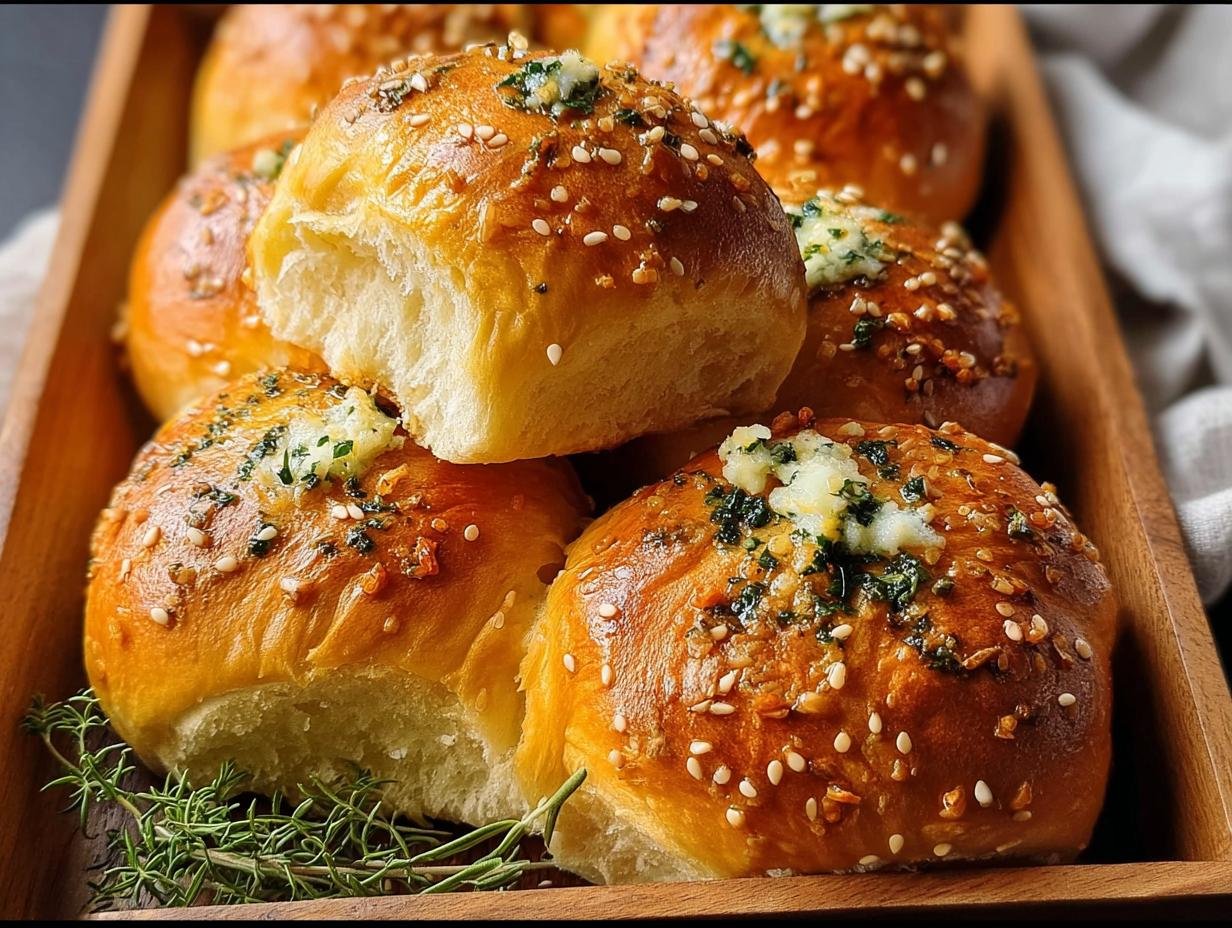
Garlic Bread Rolls Baking has never been more rewarding than with this recipe! I remember the first time I tried making these from scratch – the aroma filling my kitchen was absolutely divine, a mix of warm yeast, sharp garlic, and melting butter. These aren’t just any rolls; they’re fluffy, soft clouds of pure comfort, bursting with savory garlic and Parmesan goodness. My family devours them, and I’m sure yours will too. If you’re looking for the ultimate homemade garlic bread rolls that are surprisingly simple to achieve, you’ve come to the right place. Let’s get baking!
Why You’ll Love This Garlic Bread Rolls Baking
Get ready to impress yourself and your loved ones with these incredible garlic bread rolls. They’re more than just a side dish; they’re a flavor experience!
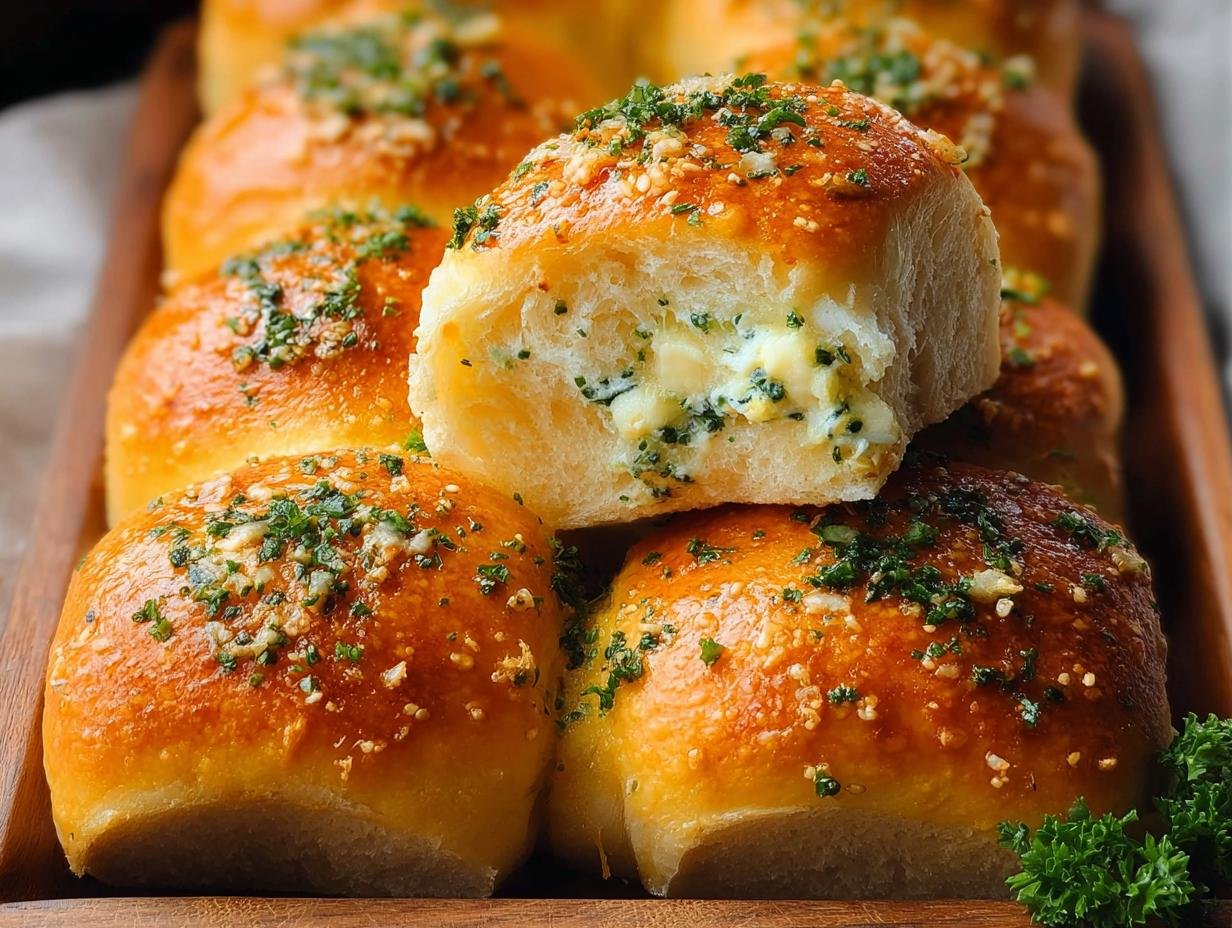
- Incredibly Soft and Fluffy Texture: These rolls are like little clouds of deliciousness thanks to the perfect dough recipe.
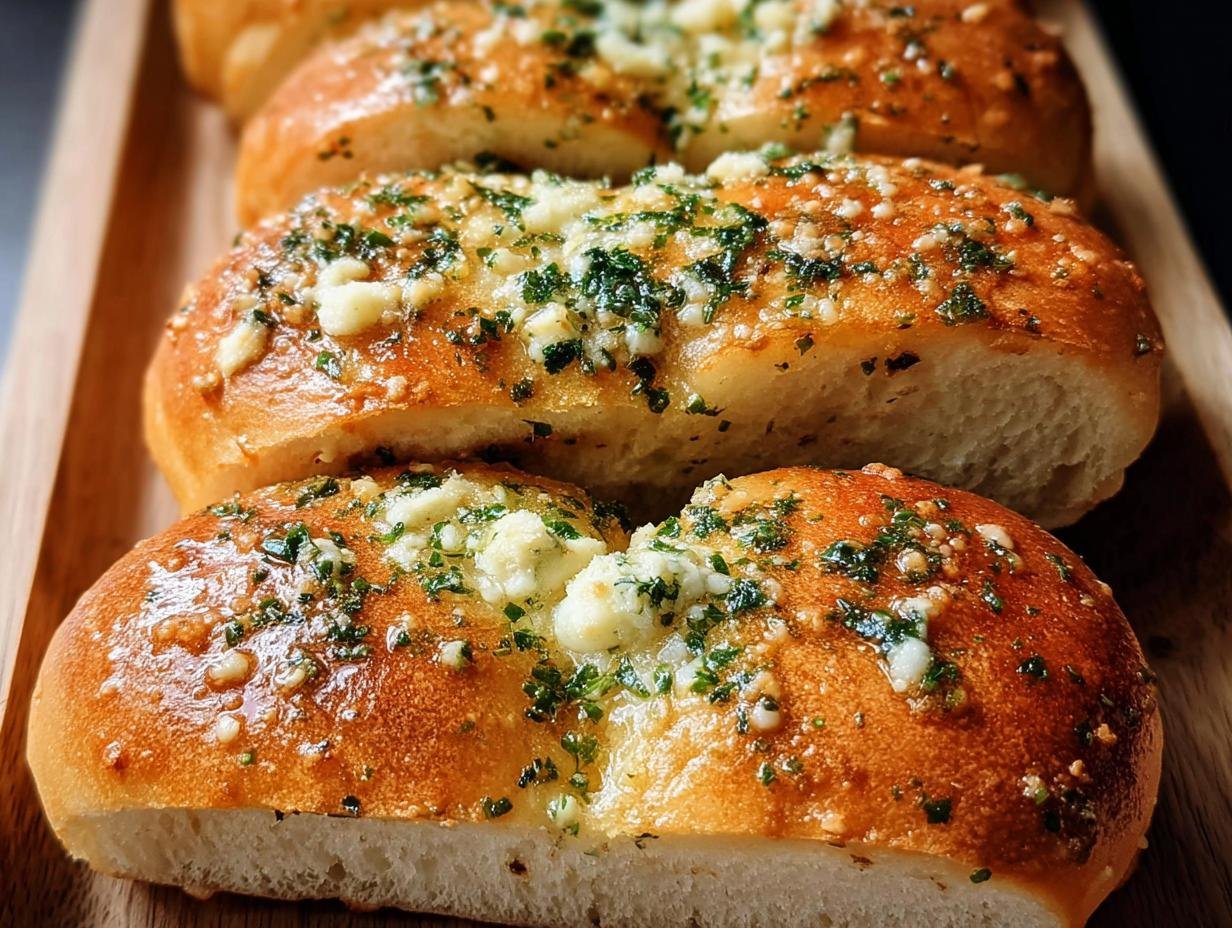
- Bursting with Garlic Flavor: We use plenty of fresh garlic and garlic butter for that irresistible savory punch.
- Perfectly Cheesy: A generous amount of Parmesan cheese adds a delightful tang and depth of flavor.
- Effortless to Make: This is truly an easy garlic bread rolls baking project, even for beginners.
- Amazing Aroma: Your kitchen will smell heavenly as these bake, signaling a delicious meal is coming.
- Versatile Side Dish: They’re the perfect accompaniment to pasta, soups, salads, or just enjoyed on their own.
- Achieve Homemade Perfection: You’ll feel so proud making these easy garlic bread rolls baking from scratch.
- Quick Prep Time: While they need rising time, the actual hands-on work is minimal.
Ingredients for Garlic Bread Rolls
Gathering these simple ingredients is the first step to creating your perfect garlic bread roll dough recipe. The magic happens with just a few pantry staples and some fresh flavor boosters!
- 1 cup warm water (105-115°F) – This is essential for activating the yeast.
- 2 ¼ teaspoons (1 packet) active dry yeast – The leavening agent that makes our rolls fluffy.
- 1 tablespoon granulated sugar – Feeds the yeast and helps with browning.
- 1 teaspoon salt – Balances the flavors and strengthens the dough.
- 4 tablespoons (½ stick) unsalted butter, melted, plus extra for greasing – Adds richness and helps create a tender crumb.
- 3 cups all-purpose flour, plus more for dusting – The base of our dough, providing structure.
- ½ cup grated Parmesan cheese – For that unmistakable savory, nutty depth.
- ¼ cup chopped fresh parsley – Adds a burst of fresh, herbaceous flavor.
- 4 cloves garlic, minced – The star of the show, bringing that pungent garlic kick.
- ½ cup (1 stick) unsalted butter, softened – For the luscious garlic butter topping.
- Salt and freshly ground black pepper to taste – To season our garlic butter perfectly.
How to Make Garlic Bread Rolls From Scratch
Let’s get down to business and create these amazing rolls! Follow these steps closely, and you’ll have warm, fragrant garlic bread rolls baking in no time.
- Step 1: Start by preheating your oven to 375°F (190°C). This ensures the rolls bake evenly and get that perfect golden-brown crust.
- Step 2: In a large mixing bowl, combine the 1 cup warm water, 2 ¼ teaspoons active dry yeast, and 1 tablespoon granulated sugar. Let this mixture sit for about 5 to 10 minutes until it gets nice and foamy – that’s your yeast waking up!
- Step 3: Stir in the 1 teaspoon salt and 4 tablespoons melted unsalted butter.
- Step 4: Gradually add the 3 cups all-purpose flour, about a cup at a time, mixing until you have a shaggy dough.
- Step 5: Turn the dough out onto a lightly floured surface. Knead it for 5 to 7 minutes until it’s smooth and elastic. You’ll feel the dough transform!
- Step 6: Grease a large bowl with a little extra butter or oil. Place the dough in the bowl, turning it once to coat all sides. Cover the bowl tightly and let it rise in a warm spot for 1 to 1.5 hours, or until it has doubled in size.
- Step 7: Gently punch down the risen dough to release the air.
- Step 8: In a separate medium bowl, mix together the ½ cup grated Parmesan cheese, ¼ cup chopped fresh parsley, and 4 cloves minced garlic.
- Step 9: Incorporate this delicious garlic and cheese mixture into the dough. Knead gently until it’s evenly distributed throughout.
- Step 10: Divide the dough into 12 equal pieces. Shape each piece into a small, neat ball.
- Step 11: Arrange the dough balls on a baking sheet lined with parchment paper, leaving a little space between each one so they have room to expand. These are your future homemade garlic bread rolls!
- Step 12: Cover the baking sheet loosely with plastic wrap and let the rolls rise again for 30 to 45 minutes, until they are almost doubled in size. This second rise is key for fluffy rolls.
- Step 13: While the rolls are having their second rise, prepare the garlic butter. In a small bowl, combine the ½ cup softened unsalted butter with a pinch of salt and freshly ground black pepper to taste.
- Step 14: Once the rolls are ready and the oven is preheated, it’s time for the garlic bread rolls oven instructions. Bake for 15 to 20 minutes, or until they are beautifully golden brown on top. The aroma will be incredible!
- Step 15: As soon as they come out of the oven, brush the tops generously with the prepared garlic butter. This step is crucial for that extra garlicky punch.
- Step 16: Let the rolls cool slightly on a wire rack before serving. Enjoy your perfectly baked garlic bread rolls! Following these garlic bread rolls oven instructions ensures a delightful outcome every time.
Pro Tips for the Best Garlic Bread Rolls Baking
Want to elevate your garlic bread rolls from good to absolutely unforgettable? I’ve picked up a few tricks over the years that make all the difference in achieving that perfect texture and flavor.
- Use room temperature ingredients: Make sure your butter and eggs (if using in other recipes) aren’t straight from the fridge. They incorporate much better into the dough.
- Don’t rush the rise: Patience is key! A slow, steady rise in a warm place develops the best flavor and the fluffiest texture for your rolls.
- Watch your oven temperature: Ovens can vary. Use an oven thermometer to ensure you’re baking at the correct temperature for golden-brown perfection.
- Fresh herbs make a difference: While dried parsley works in a pinch, fresh parsley truly brightens the flavor of these rolls.
What’s the secret to perfect homemade garlic bread rolls?
The secret to truly perfect homemade garlic bread rolls lies in a combination of a well-developed dough and a generous garlic butter finish. Ensuring your dough is kneaded until elastic and allowed to rise properly is crucial for baking perfect garlic bread rolls that are light and airy.
Can I make garlic bread rolls ahead of time?
Yes, you absolutely can! You can prepare the dough and let it complete its first rise, then refrigerate it overnight. Shape and let them rise again before baking. For baked rolls, store them at room temperature for up to 2 days.
How do I avoid common mistakes with easy garlic bread rolls baking?
A common pitfall is using water that’s too hot, which kills the yeast. Always check the temperature! Also, avoid over-flouring the dough; it should be slightly sticky before kneading. Lastly, don’t skip the second rise – it’s essential for fluffy results.
Best Ways to Serve Garlic Bread Rolls
These warm, savory rolls are incredibly versatile and make a fantastic addition to so many meals. They’re the ultimate crowd-pleaser, perfect for elevating an everyday dinner or impressing guests at a special gathering.
- Serve them alongside your favorite pasta dishes, like spaghetti with garlic and oil or creamy alfredo. They’re ideal as garlic bread rolls for dinner, soaking up every last bit of sauce.
- Pair them with hearty soups or stews, such as roasted carrot soup or beef chili. The soft, fluffy texture is like a warm hug with every bite.
- Offer them with a fresh green salad for a balanced meal. The rich garlic flavor cuts through the crispness of the greens beautifully.
Nutrition Facts for Garlic Bread Rolls
These delicious rolls are a treat, and knowing their nutritional breakdown can help you enjoy them mindfully. Here’s an approximate guide per serving, based on the recipe yielding 12 rolls:
- Calories: 180-200 (estimates can vary)
- Fat: 9-11g
- Saturated Fat: 5-6g
- Protein: 4-5g
- Carbohydrates: 20-23g
- Fiber: 1-2g
- Sugar: 3-4g
- Sodium: 200-250mg
Nutritional values are estimates and may vary based on specific ingredients and portion sizes used.
How to Store and Reheat Garlic Bread Rolls
Keeping your delicious garlic bread rolls fresh is easy with a few simple steps. Once they’ve cooled completely on a wire rack, it’s time to think about storage. For enjoying them within a few days, place the cooled rolls in an airtight container or a resealable plastic bag. This method is perfect for keeping them soft and delicious at room temperature for up to 3-4 days.
If you’ve baked a batch that’s more than you can eat in a few days, don’t worry! These tasty rolls freeze beautifully. Wrap individual cooled rolls tightly in plastic wrap, then place them in a freezer-safe bag or container. This “double-wrapping” method is a great way to prevent freezer burn and maintain quality for up to 3 months. This ensures you always have some of these savory garlic bread rolls baking goodness on hand whenever a craving strikes.
Reheating is just as simple. For rolls stored at room temperature, a quick warm-up in a 300°F (150°C) oven for 5-7 minutes does wonders. For frozen rolls, thaw them overnight in the refrigerator, then reheat using the same method. You can also reheat directly from frozen in a 350°F (175°C) oven for about 10-15 minutes, until warmed through. Enjoy your perfectly reheated, soft garlic bread rolls!
Frequently Asked Questions About Garlic Bread Rolls Baking
What makes these garlic bread rolls so fluffy?
The fluffiness comes from a few key things in this garlic bread roll recipe. We use active dry yeast that’s properly activated in warm water with sugar, which gives the dough its rise. Kneading the dough until it’s smooth and elastic develops gluten, and allowing it ample time for both the first and second rises is crucial for that light, airy texture. Don’t rush those rising times!
Can I use store-bought dough for garlic bread rolls?
While you can certainly use store-bought dough to save time, making them from scratch using this garlic bread roll recipe offers a superior flavor and texture. Homemade dough allows you to control the ingredients and ensures you get that perfect balance of soft, fluffy, and garlicky goodness. The effort is well worth it for that authentic taste!
How much garlic should I use in my garlic bread rolls?
This recipe calls for 4 cloves of minced garlic in the dough and a garlic butter topping, which provides a robust garlic flavor that isn’t overpowering. However, garlic intensity is personal! Feel free to add more minced garlic to the dough or the butter if you’re a true garlic lover. You can also add a pinch of garlic powder to the dough for an extra layer of flavor in your garlic bread rolls baking.
What’s the best way to get a crispy crust on my garlic bread rolls?
For a slightly crispier crust, you can increase the oven temperature slightly for the last few minutes of baking, or brush the tops with a little extra garlic butter right after they come out of the oven. However, this particular garlic bread roll recipe is designed for wonderfully soft rolls, so the crust will naturally be tender rather than super crispy.
Variations of Garlic Bread Rolls You Can Try
While this recipe delivers classic perfection, don’t be afraid to get creative! These delightful rolls are a fantastic base for all sorts of delicious twists.
- Cheesy Garlic Bread Rolls: For an extra layer of indulgence, add about ½ cup of shredded mozzarella or provolone cheese along with the Parmesan and parsley in Step 8. This makes for an amazing cheesy garlic bread rolls recipe that’s perfect for a party.
- Herb Variations: Swap out some or all of the parsley for other fresh herbs like chives, rosemary, or thyme. A blend of Italian herbs can also add a lovely depth of flavor.
- Spicy Kick: For those who love a little heat, add a pinch of red pepper flakes to the garlic butter mixture before brushing it on the baked rolls.
- Garlic Butter Dip: Instead of mixing garlic directly into the dough, make a simple garlic butter by melting ½ cup butter with 2 minced garlic cloves and serve it as a dipping sauce alongside plain baked rolls.
Garlic Bread Rolls Baking: 1 Amazing Flavor Recipe

Soft, fluffy garlic bread rolls packed with garlic, Parmesan, and parsley, brushed with garlic butter. This is the ultimate recipe and baking guide for delicious homemade garlic bread rolls.
- Prep Time: 25 minutes
- Cook Time: 15-20 minutes
- Total Time: 105-135 minutes
- Yield: 12 rolls 1x
- Category: Dinner
- Method: Baking
- Cuisine: American
- Diet: Vegetarian
Ingredients
- 1 cup warm water (105-115°F)
- 2 ¼ teaspoons (1 packet) active dry yeast
- 1 tablespoon granulated sugar
- 1 teaspoon salt
- 4 tablespoons (½ stick) unsalted butter, melted, plus extra for greasing
- 3 cups all-purpose flour, plus more for dusting
- ½ cup grated Parmesan cheese
- ¼ cup chopped fresh parsley
- 4 cloves garlic, minced
- ½ cup (1 stick) unsalted butter, softened
- Salt and freshly ground black pepper to taste
Instructions
- In a large bowl, combine warm water, yeast, and sugar. Let stand 5-10 minutes until foamy.
- Stir in salt and melted butter.
- Gradually add flour, one cup at a time, mixing until a shaggy dough forms.
- Turn dough onto a lightly floured surface and knead 5-7 minutes until smooth and elastic.
- Grease a large bowl with oil. Place dough in bowl, turning to coat.
- Cover and let rise in a warm place 1-1.5 hours, or until doubled.
- Gently punch down risen dough.
- In a medium bowl, combine Parmesan cheese, parsley, and minced garlic.
- Add cheese and herb mixture to dough and knead until evenly distributed.
- Divide dough into 12 equal pieces. Shape each piece into a small ball.
- Place rolls onto a baking sheet lined with parchment paper, leaving space between.
- Cover loosely with plastic wrap and let rise 30-45 minutes, or until almost doubled.
- Preheat oven to 375°F (190°C).
- In a small bowl, combine softened butter, salt, and pepper.
- Bake rolls 15-20 minutes, or until golden brown.
- Immediately brush with garlic butter.
- Let cool slightly on a wire rack before serving.
Notes
- Use fresh ingredients for best flavor.
- Don’t over-knead the dough.
- Proper rising is crucial for light and fluffy rolls.
- Use good quality butter.
- Experiment with different herbs (oregano, rosemary, thyme).
- Serve warm.
- Store leftovers in an airtight container at room temperature up to 2 days, or freeze for longer storage.
- Weighing the dough for even-sized rolls is recommended.
- A warm oven (turned off) is an ideal place for the first rise.
- You can add extra garlic powder to the garlic butter for a stronger garlic flavor.
Nutrition
- Serving Size: 1 roll
- Calories: N/A
- Sugar: N/A
- Sodium: N/A
- Fat: N/A
- Saturated Fat: N/A
- Unsaturated Fat: N/A
- Trans Fat: N/A
- Carbohydrates: N/A
- Fiber: N/A
- Protein: N/A
- Cholesterol: N/A


Leave a Reply