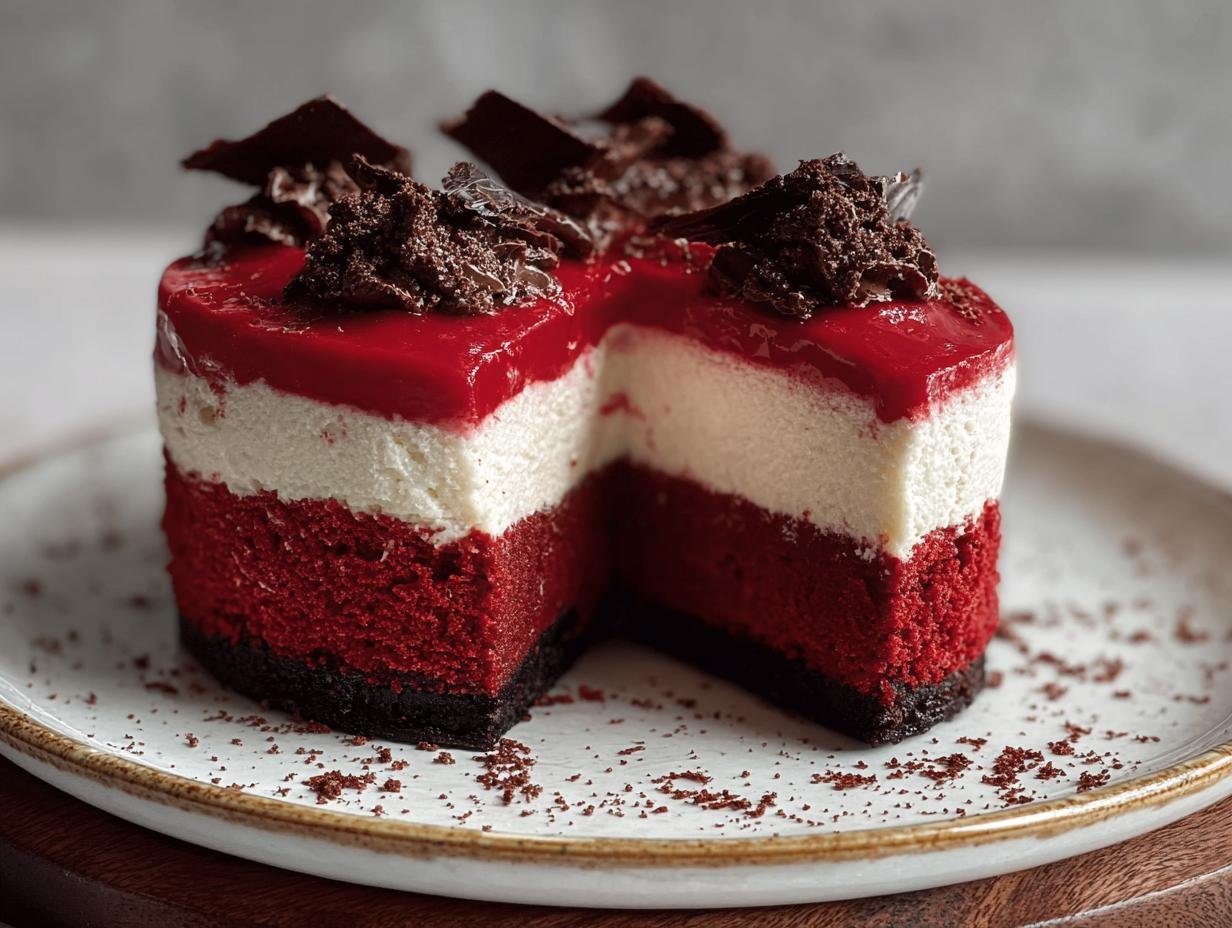
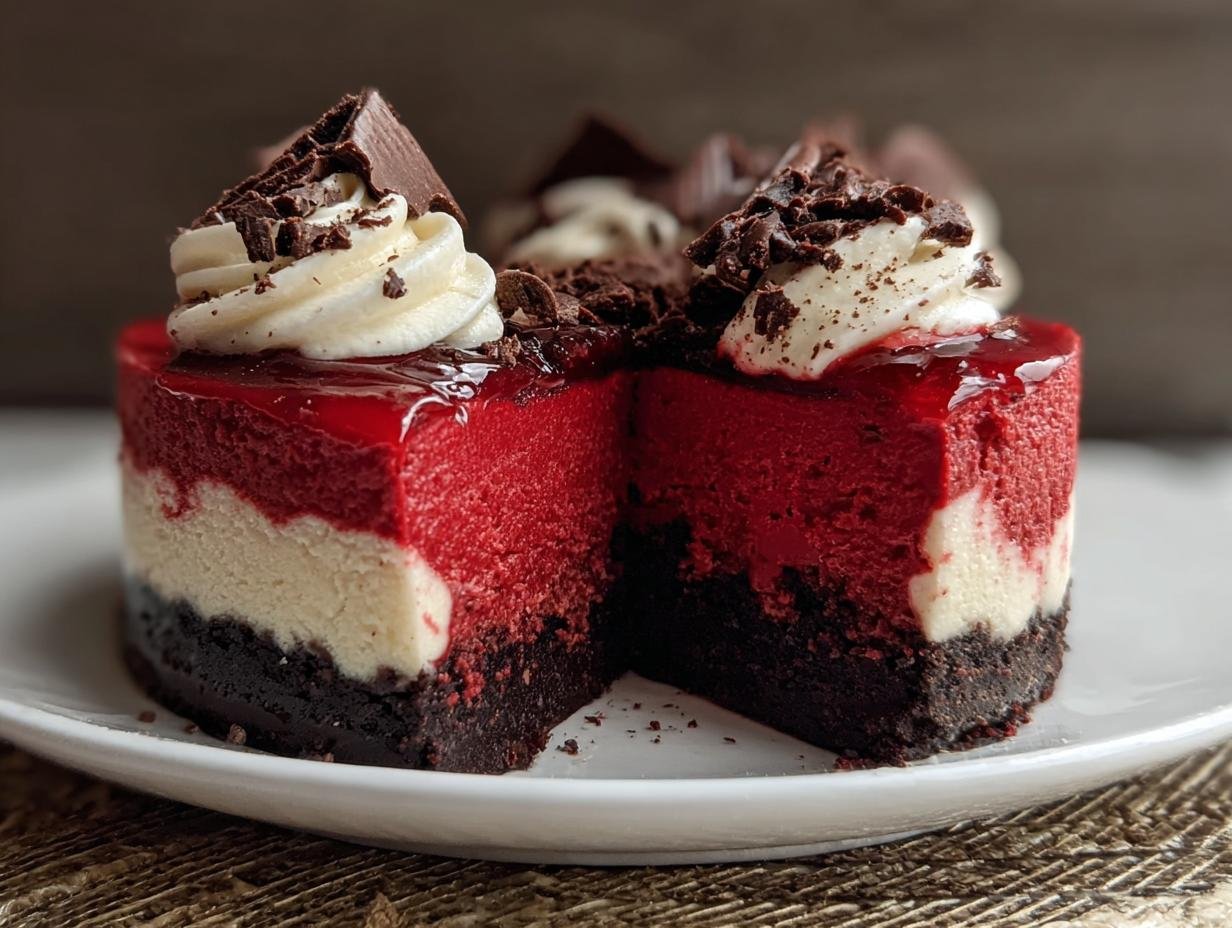
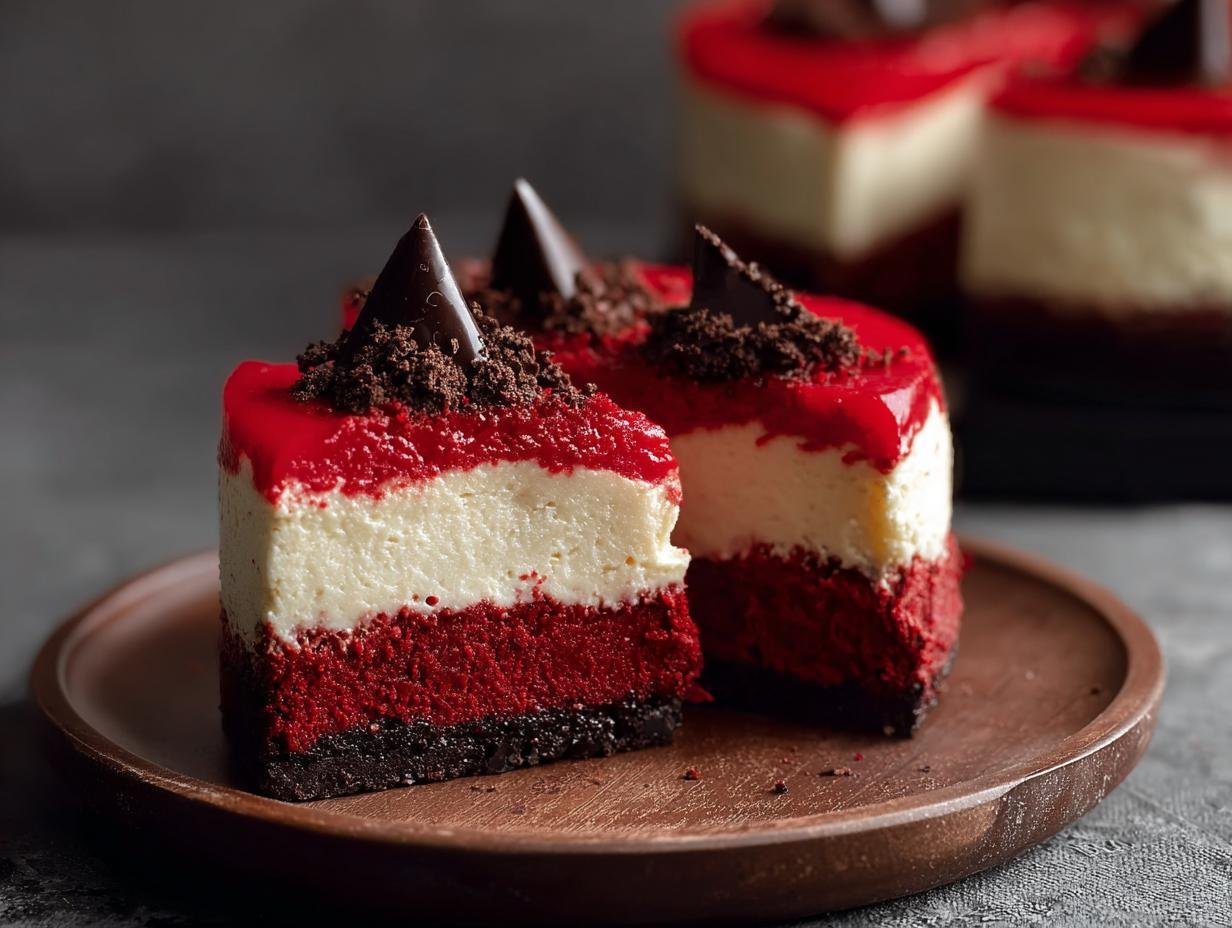
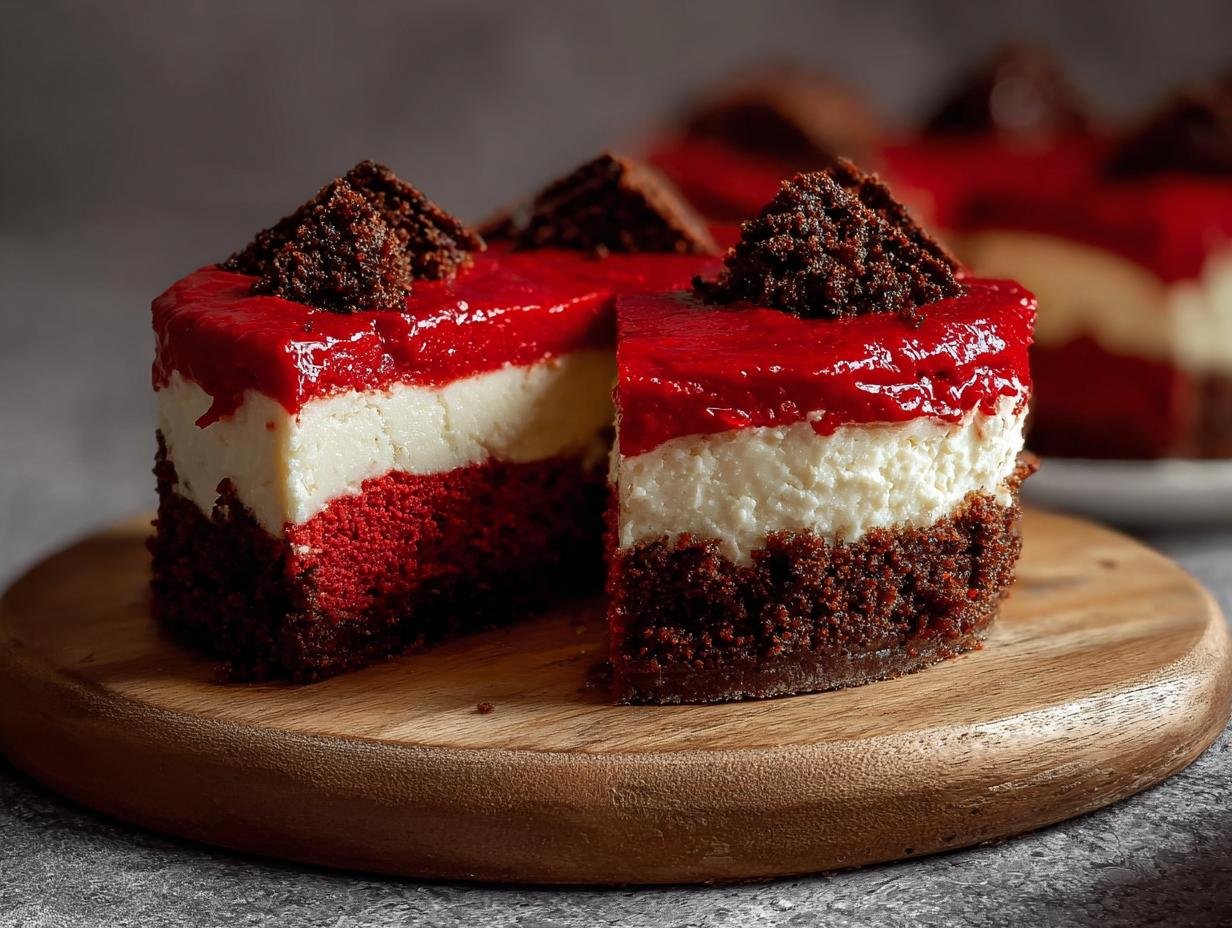
Red Velvet Cheesecakes Dessert has always felt like a special occasion treat to me, even though I’ve discovered it’s surprisingly simple to make at home! I remember the first time I tried a slice – that vibrant red color against the dark chocolate crust was so striking, and the taste was pure magic. It was a truly decadent red velvet cheesecake that melted in my mouth. Now, I get to recreate that same joy with this easy red velvet cheesecake recipe. It’s the perfect balance of rich chocolate, creamy cheesecake, and that unmistakable red velvet tang. Let’s get baking!
Why You’ll Love This No-Bake Red Velvet Cheesecake
Get ready to fall in love with this dessert! It’s the perfect blend of rich flavors and stunning aesthetics.
- Effortlessly Decadent Red Velvet Cheesecake that looks and tastes gourmet.
- Completely No Bake Red Velvet Cheesecake – no oven required, making it perfect for any season.
- A delightful chocolate Oreo crust provides the perfect crunchy base.
- The filling is unbelievably smooth, creamy, and packed with that signature red velvet flavor.
- This Homemade Red Velvet Cheesecake is surprisingly easy to assemble.
- It’s a showstopper that will impress guests at any party or gathering.
- The vibrant red color makes it a visually stunning treat.
Ingredients for Your Red Velvet Cheesecake Dessert
Gather these ingredients to create your stunning no-bake dessert. Using the right kind of cream cheese is key for that perfect texture in your Cream Cheese Red Velvet Cheesecake.
Oreo Crust Ingredients
- 200g / 7 oz Oreo cookies – finely crushed for a uniform base
- 60g / 4 tbsp unsalted butter, melted – binds the crumbs together
Red Velvet Cheesecake Filling Ingredients
- 2 tsp gelatin powder – helps the filling set firmly
- 2 tbsp water – to bloom the gelatin
- 1 cup heavy/thickened cream, fridge cold – whips up for a lighter texture
- 500g / 1 lb block cream cheese, softened – essential for a smooth, rich cheesecake filling. Make sure it’s block-style, not the spreadable kind from a tub!
- 3/4 cup caster sugar – for sweetness
- 1 tsp vanilla extract – enhances all the flavors
- 150g / 5 oz 70% dark chocolate, melted and cooled – adds a deep chocolate note
- 6 tsp red food coloring (or red gel as needed) – for that signature vibrant color
Whipped Cream Topping Ingredients
- 1 1/4 cups heavy/thickened cream, fridge cold – for a fluffy, decadent topping
- 3 tbsp caster sugar – to sweeten the topping
- 1 tsp vanilla extract – for added flavor
- 2 tbsp shaved or grated dark chocolate (optional) – for a beautiful garnish
How to Make Red Velvet Cheesecakes
Follow these simple steps to create your stunning no-bake dessert. This guide makes learning how to make red velvet cheesecake a breeze!
Preparing the Oreo Crust
- Step 1: Grab an 8-inch springform pan. Flip the base upside down and line it with parchment paper. Lightly butter the parchment and the sides of the pan before clipping the sides back on. This prevents sticking and makes removal super easy.
- Step 2: Crush your Oreo cookies in a food processor until they form fine crumbs. Add the melted butter and pulse a few more times until everything is well combined, resembling wet sand.
- Step 3: Press this crumb mixture evenly into the bottom of your prepared springform pan to form a solid crust. Pop it into the refrigerator to chill and firm up while you get started on the filling.
Making the Cream Cheese Filling
- Step 4: In a small bowl, sprinkle the gelatin powder over the water and stir. Let it sit for about 5 minutes until it looks rubbery. Then, microwave it for just 15 seconds to melt it into a smooth liquid. Set it aside to cool slightly.
- Step 5: Whip the cold heavy cream in a separate bowl until stiff peaks form. Be careful not to overwhip! Set this lovely whipped cream aside.
- Step 6: In another large bowl, beat the softened cream cheese with the caster sugar for about 2 minutes until it’s wonderfully smooth and fluffy.
- Step 7: Add the slightly cooled gelatin mixture and the vanilla extract to the cream cheese. Beat briefly until just incorporated.
- Step 8: Now, add the melted dark chocolate and your red food coloring. Beat everything together until you have a smooth, vibrant, and tempting red batter. This is where the magic happens!
- Step 9: Gently fold in about a quarter of the whipped cream to lighten the red velvet mixture. Then, carefully fold in the rest of the whipped cream until just combined. You want to keep that airy texture.
Assembling and Chilling
- Step 10: Pour the luscious red velvet filling over the chilled Oreo crust. Use a spatula to smooth the top evenly. This easy red velvet cheesecake is almost ready!
- Step 11: Cover the cheesecake and refrigerate it for at least 6 hours, or preferably overnight, until it’s completely set and firm. Patience is key here!
- Step 12: Once set, carefully release the sides of the springform pan. Transfer your beautiful creation to a serving plate and gently peel off the parchment paper from the base.
Preparing the Whipped Cream Topping
- Step 13: Just before serving, whip the cold heavy cream with the caster sugar and vanilla extract until soft, fluffy peaks form. This topping adds a final touch of decadence.
- Step 14: Pile the whipped cream onto the center of your set cheesecake. Garnish with shaved or grated dark chocolate, if desired, for an extra gourmet touch.
Pro Tips for the Best Red Velvet Cheesecake Recipe
Want to elevate your dessert game? These little tricks will ensure your creation is absolutely perfect every time. Achieving a truly decadent red velvet cheesecake is all about attention to these details!
- Always use block-style cream cheese, not the spreadable kind, for that essential smooth and firm texture.
- Don’t skip blooming the gelatin; it’s crucial for a no-bake cheesecake that sets perfectly without becoming rubbery.
- For a deeper, richer red hue, consider using red gel food coloring instead of liquid, as it provides more color with less liquid.
- Ensure your heavy cream for both the filling and topping is well-chilled for optimal whipping.
What’s the secret to a perfect ‘Velvety Red Cheesecake Dessert’?
The secret lies in the balance of smooth cream cheese, rich melted chocolate, and the subtle tang of red velvet. Using block cream cheese and properly incorporating the gelatin are key for that signature velvety texture in this Best Red Velvet Cheesecake Recipe. For more insights on achieving perfect cheesecake textures, you can explore resources on food science principles.
Can I make this ‘Red Velvet Cheesecake Dessert’ ahead of time?
Absolutely! This no-bake dessert is perfect for making ahead. Assemble the cheesecake completely and let it chill overnight. Store it covered in the refrigerator for up to 4 days before serving.
How do I avoid common mistakes with ‘Red Velvet Cheesecakes Dessert’?
Avoid using tub cream cheese, as it’s too soft and won’t allow the cheesecake to set properly. Also, be patient with the chilling time; rushing it means a runny dessert. Lastly, ensure your melted chocolate is cooled, or it could melt the cream cheese mixture. For more on common baking pitfalls, check out this guide on culinary techniques.
Best Ways to Serve Your Red Velvet Cheesecake
This stunning dessert is fantastic on its own, but I love dressing it up a bit! Serving this Red Velvet Cheesecake Dessert is almost as fun as making it.
- Classic Elegance: Simply serve chilled slices with a dollop of extra whipped cream and a sprinkle of shaved dark chocolate. It’s a simple yet sophisticated presentation.
- Berry Bliss: Pair a slice with a side of fresh raspberries or a mixed berry compote. The tartness of the berries cuts beautifully through the richness of the cheesecake, offering delightful Red Velvet Dessert Ideas for complementary flavors.
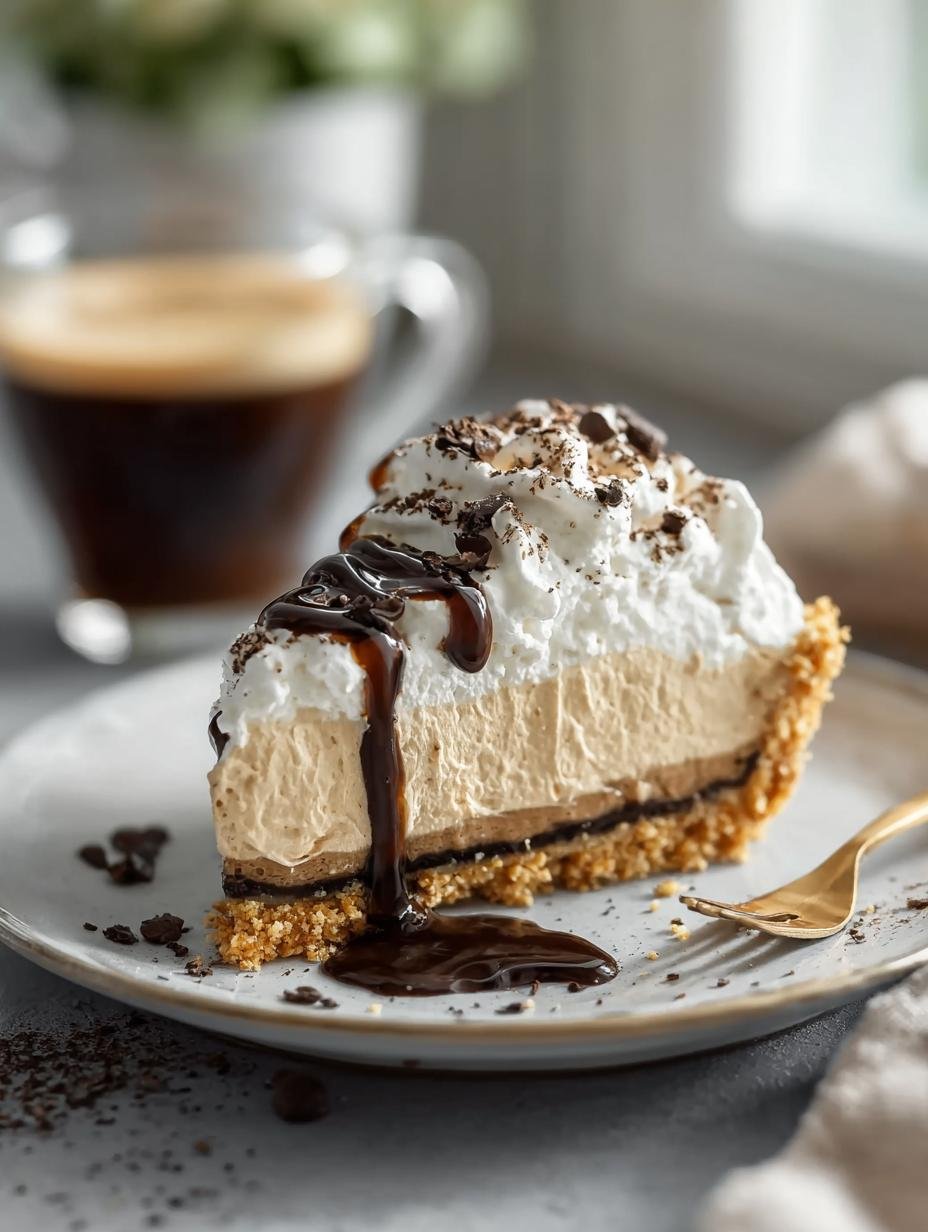
- Coffee Companion: This dessert is also wonderful served with a hot cup of coffee or a latte. The slight bitterness of the coffee enhances the sweet, chocolatey notes of the cheesecake.
Nutrition Facts for Red Velvet Cheesecakes Dessert
Here’s a look at the estimated nutritional breakdown for this delicious Red Velvet Cheesecake Dessert, per serving.
- Calories: Approximately 450-500 kcal (this can vary based on exact ingredients and portion size)
- Fat: Around 30-35g
- Saturated Fat: Approximately 18-22g
- Protein: About 5-7g
- Carbohydrates: Roughly 40-45g
- Fiber: Around 2-3g
- Sugar: Approximately 30-35g
- Sodium: About 200-250mg
Nutritional values are estimates and may vary based on specific ingredients used, especially the type of cookies and chocolate. For more information on general nutritional guidelines, consult resources like the Eatwell Guide.
How to Store and Reheat Your Red Velvet Cheesecake
Properly storing this delightful dessert ensures you can enjoy every last bite. Once your Red Velvet Cheesecake has completely cooled after coming out of the pan, it’s ready for storage. For short-term keeping, place it in an airtight container or cover it carefully with plastic wrap and store it in the refrigerator. It should stay fresh and delicious for about 3 to 4 days.
If you find yourself with leftovers you can’t finish within a few days, don’t worry! This no bake red velvet cheesecake freezes beautifully. Wrap individual slices tightly in plastic wrap, then in aluminum foil, or place them in a freezer-safe container. Properly stored, it can last for up to 3 months in the freezer. When you’re ready to enjoy a frozen slice, simply transfer it to the refrigerator overnight to thaw. Reheating isn’t usually necessary, as it’s best served cold, but if you prefer a slightly softer texture, you can let it sit at room temperature for about 15-20 minutes before serving.
Frequently Asked Questions About Red Velvet Cheesecakes
What is Red Velvet Cheesecake?
Red Velvet Cheesecake is a delightful fusion dessert combining the rich, creamy texture of classic cheesecake with the distinct flavor and vibrant color of red velvet cake. It typically features a chocolatey crust, a smooth, cream cheese-based filling swirled with red velvet elements, and often a cream cheese frosting or whipped topping.
Why is Red Velvet Cheesecake Popular?
Its popularity stems from a combination of factors! The striking visual appeal of the deep red color against a contrasting crust or topping is incredibly inviting. Flavor-wise, it offers a unique taste that’s less intensely chocolate than a typical chocolate cheesecake but richer than a plain one, with a slight tang. This Red Velvet Cheesecakes Dessert hits all the right notes for a special occasion treat.
Can I use a different type of cookie for the crust?
Absolutely! While Oreos provide a fantastic chocolatey base that complements the red velvet flavor perfectly, you can experiment. Graham crackers, chocolate wafers, or even gingersnap cookies could offer a delicious alternative. Just ensure you adjust the butter amount as needed to get that perfect crumbly consistency.
How do I get a really smooth red velvet filling?
For the smoothest filling, make sure your cream cheese is truly softened to room temperature – this is crucial. Beat the cream cheese and sugar together until completely fluffy before adding other ingredients. Also, ensure your melted chocolate has cooled slightly before incorporating it, and don’t overmix once you add the whipped cream to maintain a light texture.
Variations of Red Velvet Cheesecake Dessert You Can Try
This recipe is a fantastic base, but there are so many fun ways to switch up your red velvet creation! Whether you’re looking for smaller portions or a different format, these variations offer something for everyone.
- Mini Red Velvet Cheesecakes: Make individual servings by using a muffin tin lined with paper liners. Pour the filling into the crust-lined cups and adjust chilling time to around 2-4 hours, as they set faster. They’re perfect for parties!
- Red Velvet Cheesecake Bars: For an easy-to-serve dessert, press the crust into a square or rectangular baking pan. Pour the filling over and chill. Once set, cut into bars. This is a great option for potlucks or when you need a portable treat.
- Baked Version: If you prefer a traditional baked cheesecake, you can adapt this recipe. Add an egg to the filling and bake at 325°F (160°C) until the edges are set but the center still has a slight jiggle. The cooking time will vary, so watch it carefully.
- Dietary Adjustments: For a gluten-free option, swap Oreos for gluten-free chocolate sandwich cookies. You can also experiment with dairy-free cream cheese alternatives and plant-based whipping cream for a vegan-friendly version, though results may vary in texture.
Decadent Red Velvet Cheesecakes: 1 Easy Recipe

A no-bake red velvet cheesecake featuring a chocolate Oreo crust, a smooth and creamy red velvet filling, and a whipped cream topping. This visually stunning dessert is perfect for any occasion.
- Prep Time: 30 minutes
- Cook Time: 0 minutes
- Total Time: 6 hours 30 minutes
- Yield: 12–16 servings 1x
- Category: Dessert
- Method: No-Bake
- Cuisine: American
- Diet: Vegetarian
Ingredients
- 200g / 7 oz Oreo cookies
- 60g / 4 tbsp unsalted butter, melted
- 2 tsp gelatin powder
- 2 tbsp water
- 1 cup heavy/thickened cream, fridge cold
- 500g / 1 lb block cream cheese, softened
- 3/4 cup caster sugar
- 1 tsp vanilla extract
- 150g / 5 oz 70% dark chocolate, melted and cooled
- 6 tsp red food coloring (or red gel as needed)
- 1 1/4 cups heavy/thickened cream (for topping), fridge cold
- 3 tbsp caster sugar (for topping)
- 1 tsp vanilla extract (for topping)
- 2 tbsp shaved or grated dark chocolate (optional)
Instructions
- Flip the base of an 8″ springform pan upside down and line with parchment paper. Lightly butter it and clip the sides in place.
- Crush Oreo cookies in a food processor to a fine crumb. Add melted butter and pulse again to combine. Press the mixture into the prepared pan to form the crust. Refrigerate while making the filling.
- In a small bowl, sprinkle gelatin over water and stir. Let bloom for 5 minutes until rubbery, then microwave for 15 seconds to melt. Let cool slightly.
- Whip cold cream until stiff peaks form. Set aside.
- In another bowl, beat softened cream cheese with sugar until smooth and fluffy (2 minutes).
- Add cooled gelatin and vanilla, then beat briefly.
- Add melted chocolate and red food coloring. Beat until well combined and smooth.
- Fold in 1/4 of the whipped cream to lighten the filling, then gently fold in the remaining cream.
- Pour filling over the Oreo crust and smooth the top.
- Refrigerate at least 6 hours or overnight until set.
- Release the pan, transfer cheesecake to a serving plate, and peel off the parchment.
- Whip cream with sugar and vanilla for topping. Pile onto the center of the cheesecake and garnish with shaved chocolate.
Notes
- Use block-style cream cheese, not spreadable tubs.
- For brighter red color, adjust the amount of red gel or liquid coloring as needed.
- Let gelatin cool before adding to avoid lumps.
- Use stabilized whipped cream for make-ahead decoration.
- Store cheesecake in the fridge for up to 5 days.
Nutrition
- Serving Size: 1 slice


Leave a Reply